Modifying Laser Mapping Solution
Overview
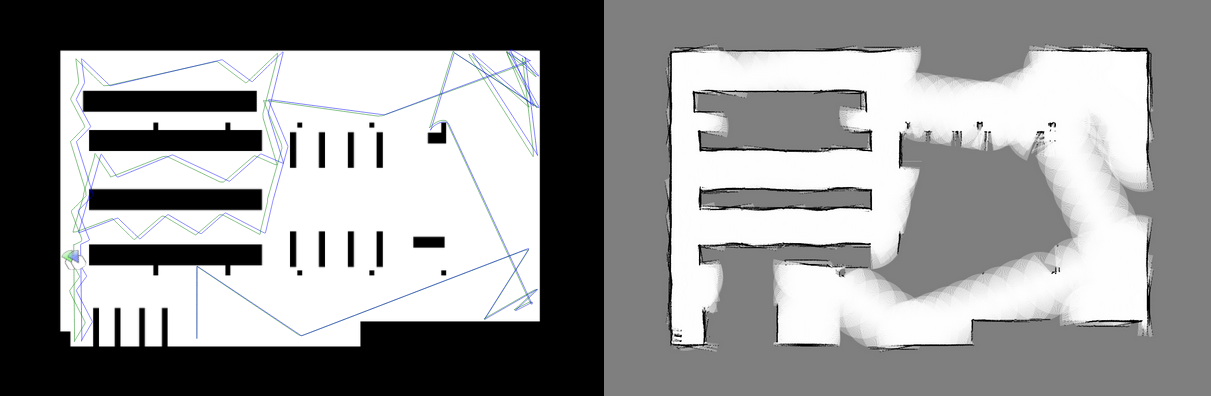
This week I modified the laser mapping solution, specifically, the way it builds the map.
The previous version didn’t differenciate between unknown cells and cells with free space, both were painted white. In this new version the unknown cells will be painted gray and become darker the more the algorithm is sure they are an obstacle and clearer the more it detects the cells as free space.
New building process
The new solution saves an array with the same dimensions as the image with the logarithm of the ratios of each cell. In the beginning it starts with all values set to 0, which is the equivalent of not knowing the state of the cells. To update the array, first I calculate the probabilities, which works in a similar way as to how I would build the map in the previous version, but this time I also count the cells between the robot position and the walls the laser collides. All free spaces are assigned 0.4 probability and the cells with an obstacle 0.7. I also assign the obstacle value to the cells surrounding them, so the walls look a bit thicker in the map. Then I calculate the ratio of those probabilities (ratio = prob / [1 - prob]) and then the logarithm (to the base of e) of those ratios, so I can add instead of multiply them, and add the values to the array in their correct positions. The values of these cells are as follow: The closer they are to -infinity, the clearer the map cells get (tending to 0) and the closer they are to +infinity, the darker they get (tending to 255), the middle point, zero, is the value of cells in an unknown state (128 in map values).
To set the user map, I turn this array to map values (0 to 255) by reverting this process until I get the probabilities (0 to 1) and multiply them by 255.