Week 3
To-do
These were the tasks from the previous meeting:
- Reflect changes from the Docker container into the SSD and vice versa
- Discover the files that are referred to in amazonrobot_1_warehouse.launch. This was a task that came up along with the query that how does the Amazon Warehouse file launch even when there aren’t any worlds or navigation packages in amazon_warehouse.
Approach
To perform the above tasks, it is very apparent that I have to first run the docker image. There are two ways to do this as mentioned in README.md.
- Build the image locally.
- Pull the image from DockerHub.
After the docker container runs successfully, I have to mount an external directory and then try to reflect the changes in this directory. In addition to this, I have to do a treasure hunt inside the container to find the navigation and world files for the amazon_warehouse exercise.
Running the container
Building the image locally
This was quite a task. As per the instructions, the command to build the docker image locally is:
git clone -b foxy https://github.com/JdeRobot/RoboticsAcademy.git
cd RoboticsAcademy/scripts
chmod +x build.sh
./build.sh
docker run -it \
      --rm \
      -v /tmp/.X11-unix:/tmp/.X11-unix \
      --name foxy_radi_container \
      -v $PWD/../:/RoboticsAcademy \
      -p 8000:8000 -p 2303:2303 -p 1905:1905 -p 8765:8765 -p 6080:6080 -p 1108:1108 \
      jderobot/robotics-academy:4.0.0 ./start.sh
The first question that came to mind was why is the nametag jderobot/robotics-academy:4.0.0 when clearly the image that I want to build is 4.2.0. Turns out, as long as we’re building locally, the nametag doesn’t matter. We shall only bother ourselves with the nametag when we push the image to DockerHub.
The first hurdle that came up when trying to build locally was that the links for downloading VirtualGL and TurboVNC weren’t working. The error output was as follows:
Step 13/35 : RUN curl -fsSL -O https://s3.amazonaws.com/virtualgl-pr/main/linux/virtualgl_${VIRTUALGL_VERSION}_amd64.deb &&     curl -fsSL -O https://s3.amazonaws.com/virtualgl-pr/main/linux/virtualgl32_${VIRTUALGL_VERSION}_amd64.deb &&     apt-get update && apt-get install -y --no-install-recommends ./virtualgl_${VIRTUALGL_VERSION}_amd64.deb ./virtualgl32_${VIRTUALGL_VERSION}_amd64.deb &&     rm virtualgl_${VIRTUALGL_VERSION}_amd64.deb virtualgl32_${VIRTUALGL_VERSION}_amd64.deb &&     chmod u+s /usr/lib/libvglfaker.so &&     chmod u+s /usr/lib/libdlfaker.so &&     chmod u+s /usr/lib32/libvglfaker.so &&     chmod u+s /usr/lib32/libdlfaker.so &&     chmod u+s /usr/lib/i386-linux-gnu/libvglfaker.so &&     chmod u+s /usr/lib/i386-linux-gnu/libdlfaker.so &&     curl -fsSL -O https://s3.amazonaws.com/turbovnc-pr/dev/linux/turbovnc_${TURBOVNC_VERSION}_amd64.deb &&     apt-get update && apt-get install -y --no-install-recommends ./turbovnc_${TURBOVNC_VERSION}_amd64.deb &&     rm turbovnc_${TURBOVNC_VERSION}_amd64.deb &&     rm -rf /var/lib/apt/lists/* &&     echo -e "no-remote-connections\nno-httpd\nno-x11-tcp-connections\nno-pam-sessions\npermitted-security-types = None, VNC, otp" > /etc/turbovncserver-security.conf
 ---> Running in 69a9eb7591f7
curl: (22) The requested URL returned error: 404 Not Found
I opened an issue regarding this and made a pull request to fix it. Soon enough, this step of building the image went through successfully.
Post this, I encountered another hurdle. The error output this time was
Step 26/35 : RUN git clone --recursive https://github.com/eProsima/Fast-DDS.git -b v2.0.0 /tmp/FastRTPS-2.0.0    && cd /tmp/FastRTPS-2.0.0       && mkdir build && cd build       && cmake -DTHIRDPARTY=ON -DSECURITY=ON ..        && cmake --build . --target install -- -j $(nproc)      && rm -rf /tmp/*
 ---> Running in 49b1ac4349cd
The command '/bin/sh -c git clone --recursive https://github.com/eProsima/Fast-DDS.git -b v2.0.0 /tmp/FastRTPS-2.0.0     && cd /tmp/FastRTPS-2.0.0        && mkdir build && cd build      && cmake -DTHIRDPARTY=ON -DSECURITY=ON ..        && cmake --build . --target install -- -j $(nproc)      && rm -rf /tmp/*' returned a non-zero code: 2
The conclusion so far is that there is a problem in the codebase of the Fast-DDS repository. Having no clue as to the solution of this, I communicated the issue to my mentors and stalled the local build attempt till this is resolved.
Pulling the image from DockerHub
The command to pull the image from DockerHub was outdated at README.md. I discovered this when I had already pulled the 4.0.0 image and run it using this command
docker run -it \
      --rm \
      -v /tmp/.X11-unix:/tmp/.X11-unix \
      --name foxy_radi_container \
      -p 8000:8000 -p 2303:2303 -p 1905:1905 -p 8765:8765 -p 6080:6080 -p 1108:1108 \
      jderobot/robotics-academy:4.0.0 ./start.sh
On running this, I discovered that there was neither the Amazon warehouse exercise nor the Rviz2 web template in this image. Consequently, I changed the last line to jderobot/robotics-academy:4.2.0 ./start.sh in an attempt to run the newer image. However, in this attempt, the Rviz2 template was unable to connect. When my mentor suggested me to expose proper ports, I visited DockerHub and scrolled down to find the ports being exposed in the image. After a small skirmish with ports 8080 and 8000, I was finally able to run the image using this command
docker run -it \
      --rm \
      -v /tmp/.X11-unix:/tmp/.X11-unix \
      --name foxy_radi_container \
      -p 8000:8000 -p 2303:2303 -p 1905:1905 -p 8765:8765 -p 6080:6080 -p 1108:1108 -p 6081:6081 -p 1831:1831 -p 7681:7681 \
      jderobot/robotics-academy:4.2.0 ./start.sh
Mounting external directory
As a beginner, I decided to mount the home directory of my computer to the home directory of the container. I added -v /home:/home in the command to do so. The final docker command looked something like this,
docker run -it \
      --rm \
      -v /tmp/.X11-unix:/tmp/.X11-unix \
      -v /home:home \
      --name foxy_radi_container \
      -p 8000:8000 -p 2303:2303 -p 1905:1905 -p 8765:8765 -p 6080:6080 -p 1108:1108 -p 6081:6081 -p 1831:1831 -p 7681:7681 \
      jderobot/robotics-academy:4.2.0 ./start.sh
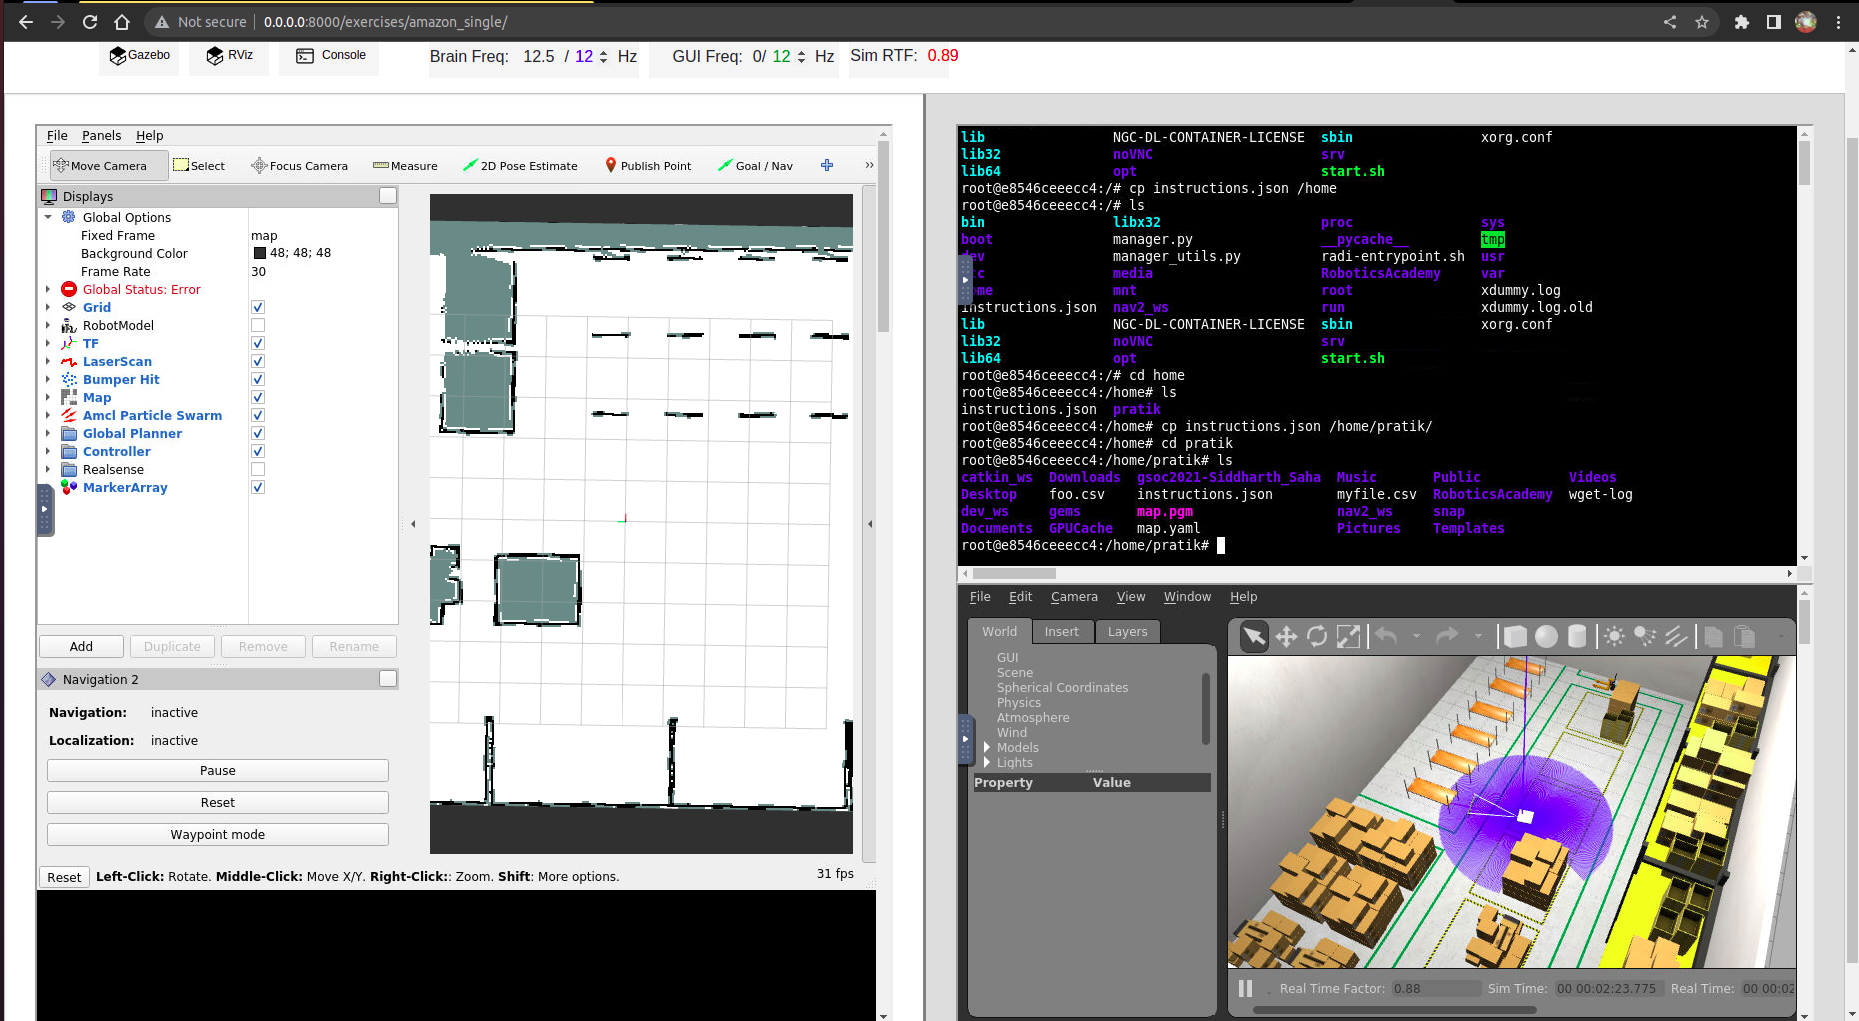
This successfully ran the image. After this, I ran a sequence of commands in the console illustrated in this image.

After shutting down the container, I opened a new terminal and ran the following commands.
pratik@DolceParadise:~$ cd ..
pratik@DolceParadise:/home$ ls
instructions.json  pratik
pratik@DolceParadise:/home$
This confirmed that the changes made in the container were reflected in the external mounted directory, i.e. my computer.
How is the Amazon Exercise Running?
“cd”ing into the container files, I found out that the directories nav2_ws and opt/ros/foxy had the necessary packages to run the exercises. Now that I have had some experience dabbling with Docker, I feel a little more confident going into this project. Onwards and Upwards!
Conclusions
| Activity | Details |
|---|---|
| Tasks Completed | 2/2 |
| Issues Created | 2 1768 1764 |
| Pull Requests | 2 1769 1765 |